Have you ever noticed how we rarely bother to look at the things that we trust with our lives? People will go hurtling down the highway with an 8,000 pound trailer strapped to their butt and never check the tire pressure, even though a blown tire on the tow vehicle can mean a disastrous end. And few people ever look at the connection between trailer and tow vehicle, the thing that keeps the trailer from becoming an unguided aluminum missile. I’m talking about that ugly chunk of welded metal underneath called the “hitch receiver.”
The hitch receiver gets bolted on either at the factory or shortly before you buy your first trailer, and then generally it never gets examined again. Most of the time people get away with ignoring the receiver because they don’t do much towing. But if you tow a lot, or you tow heavy trailers, you really need to take a look at this thing once in a while — because what you haven’t noticed can hurt you.
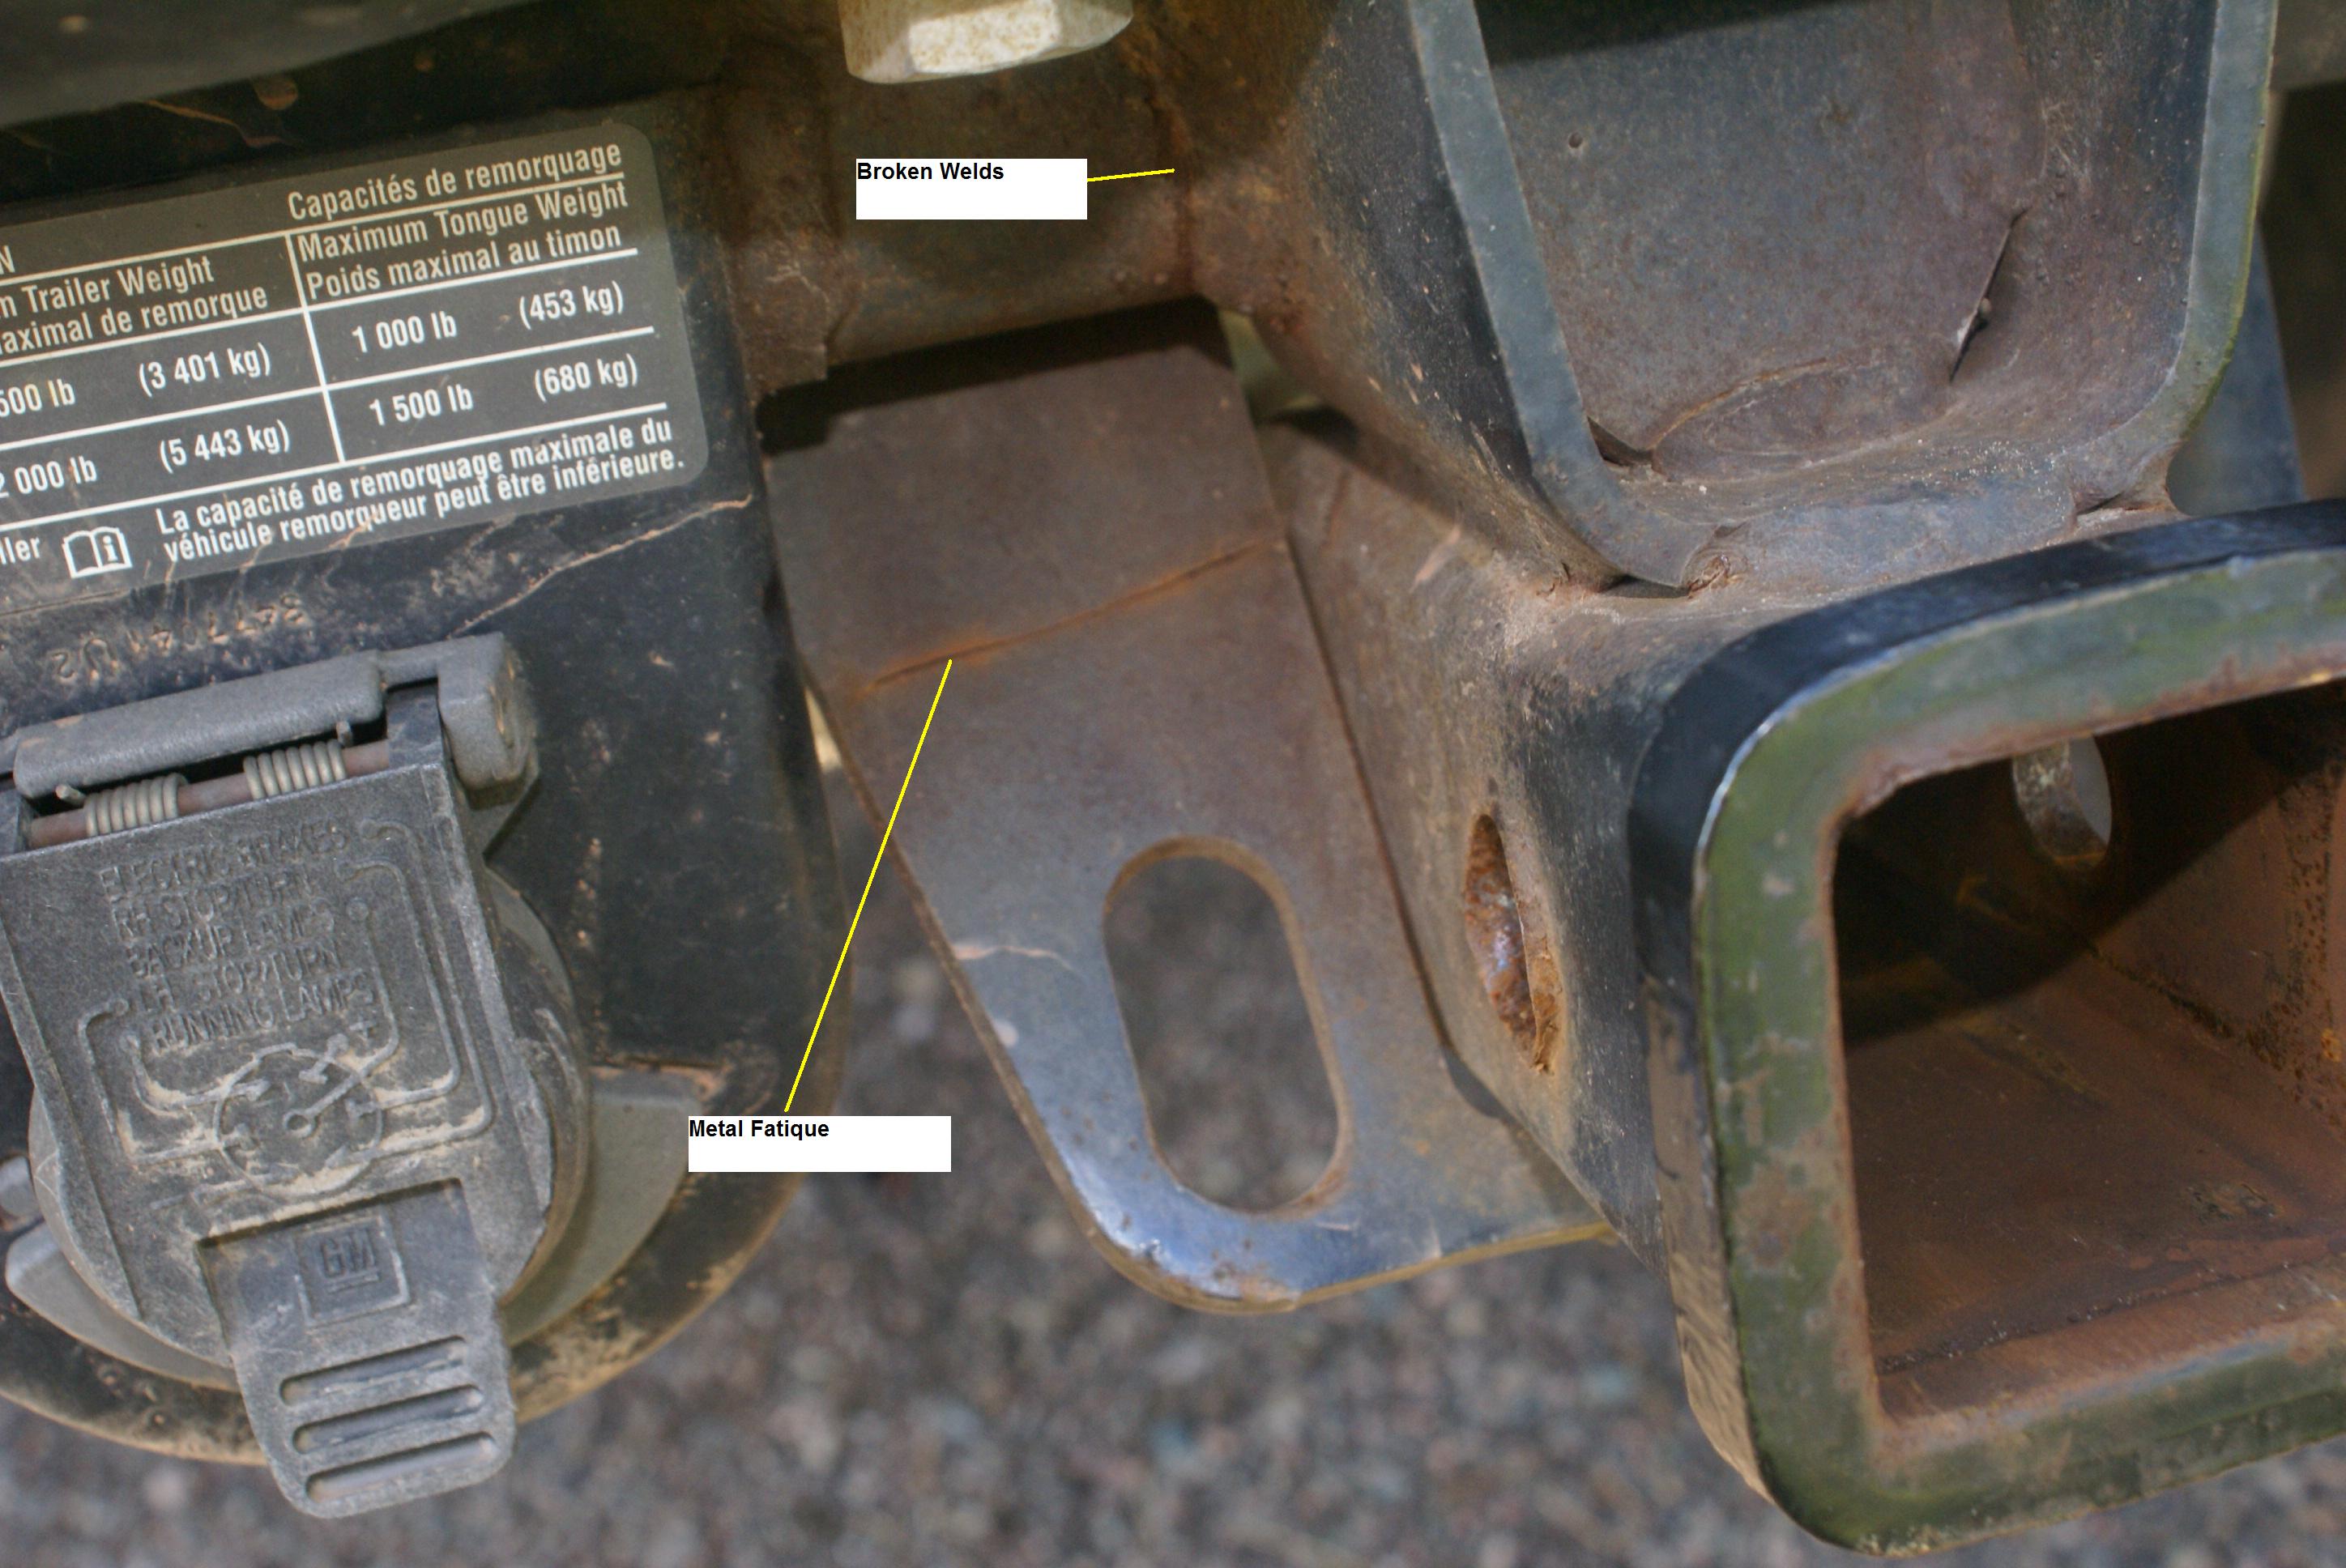
 I’m saying this because it seems like about once or twice every year a friend of mine reports that he discovered that his hitch receiver was in dire condition — and sometimes this fact is discovered too late, as you can see in the picture. That’s a Class V Original Equipment hitch receiver on a late-model truck, and it is ripped clean off.
This happened at low speed, right after exiting an Interstate highway. That’s when receivers usually fail, because the stress encountered from sharp turns, dips, and potholes is usually greater than the stress on the receiver when cruising on the highway. (Andy Thomson talked about this in one of his recent articles about towing, which was published in the Winter 2010 issue of Airstream Life.) The apparent causes of this failure were metal fatigue and rust — the owner lived in a northern climate where the roads are salted.
Last year another friend reported that his hitch was “bouncy” and I encouraged him to examine the OEM (Original Equipment) receiver. He took it to a local hitch specialist, where they found it was riddled with serious cracks. The receiver was replaced that day with a far superior aftermarket brand. Both of these friends are long-term, experienced Airstreamers, but they just never crawled under the truck to take a look at this crucial equipment.
 That’s why I advocate that every travel trailer owner take a few minutes every year to conduct a simple hitch inspection — or have it done on a lift by a mechanic. Today I took a few minutes to do mine, and it was very easy.
The tools are simple. I used a cordless drill with a brass wire brush attachment, and a second wire brush with a handle (not pictured) for the tight spaces. Those tools are to clean up rusty spots. A bright LED headlamp and a flashlight are needed to closely examine the corners and crevices, and a can of spray paint can be used after inspection to make the receiver look new again.

When underneath the car, I looked for shiny lines on welds that would indicate a recent crack, rusty lines against painted areas that might indicate an old crack, broken welds, bent metal, and loose or rusty mounting bolts. This took me about 10 minutes, as I lay beneath the car and carefully studied every weld with the flashlight. (A magnifying glass can be useful if you have trouble seeing things up close.)
If you want to see what cracks in the receiver might look like, click here. This picture is from a GM OEM hitch, not my vehicle.
I also studied the receiver box itself. Notice in the picture of my hitch (above) that there’s a strengthening collar on the back end. This is a common feature in receiver boxes.  However, receiver manufacturers seem to rarely put a strengthening collar on the front end of the receiver box, even though both ends endure the same stress. For this reason it’s a good idea to take a close look at the front end of the receiver box to ensure that the box itself it not splitting or cracking at the corners. The picture of a splitting receiver box (at right) is not from my tow vehicle!
If you look closely at the picture of my hitch (above, before cleanup), you might see that there has been a small amount of elongation of the hitch pin hole, making it slightly oval. This is caused by the hitch pin shifting slightly under load, which is a sign that it is not a tight fit. This amount of elongation is not a problem in my opinion but I’m going to keep an eye on it.
Once I was done, it was time to clean up the hitch. My goal was to remove all the surface rust and repaint so that if a weld broke or a fatigue crack formed, I would be able to spot it immediately. This is where the wire brushes came into play. I scrubbed the rust until the metal was shiny (easily done with the cordless drill attachment) and wiped it clean. Then I inspected the spots I’d cleaned once again, just to be sure I hadn’t missed a possible crack or broken weld.
 I had two leftover cans of spray paint, silver and flat black, but decided to go with the black. A few sheets of paper and some blue painter’s tape masked off the car’s bumper while I sprayed. Since I expect to do this procedure annually, I wasn’t super fussy about the paint I used. It will get removed or at least scuffed up next winter when I inspect again.
This spring, when you are de-winterizing your trailer, take a few minutes to do a good inspection of your tow vehicle’s receiver. It has to manage thousands of foot-pounds of torque from the torsion bars, and goes through thousands of stress cycles every time you tow. I don’t think there’s any other part of your tow rig that has to bear up to so much repeated stress. By the time you can feel something from the driver’s seat, it may be too late. If you don’t want to crawl under the car you can take it to any hitch specialist and have them check it for you. Prevention of a problem is easy, and it’s well worth the effort!
Rich, we’re rolling SW again and thanks for putting our hitch picture on your blog. Yes, that was an Easter Sunday to remember. Your clean-up/inspection tips are great. One thing a person could add to your procedure is to buy a spray bottle of POR 15 pre-primer rust remover and a small can of POR 15 primer. The pre-primer, after wire brushing will coat the metal with an acid etch which neutralizes hidden rust (this could be left alone at this point as long as the surface is not subject to UV) and road water only enhances the protection value of this product. To be safe, prime over it to add to the protection value. I believe this has to be bought in-line and direct from:
http://www.por15.com/
This is good stuff and well respected for metal restoration and maintenance.
Excellent article; you are right the hitch and receiver both need to inspected and painted. Put that on my to do list.
Ed